儿童节快乐!无论你是还在读书的孩子,还是早已成人的装嫩青年。小编在这里都祝大家节日快乐。今天我们来学习一下如何使用Photoshop制作儿童节贺卡,有兴趣的朋友们来学习一下。
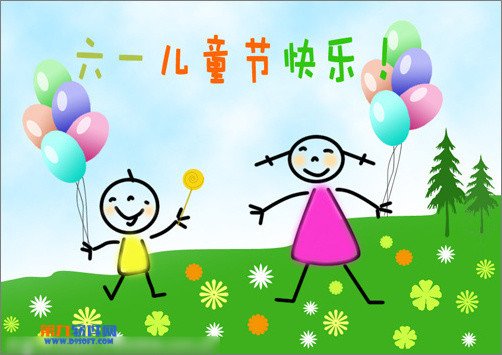
效果图:
PS儿童节贺卡(一) Photoshop制作儿童节贺卡
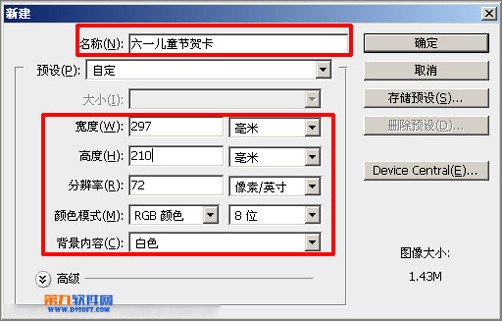
1、执行菜单:“文件”/“新建”(快捷键Ctrl+N),新建文件,设置名称:六一儿童节贺卡;宽度:297像素;高度:210像素;分辨率:72像素。
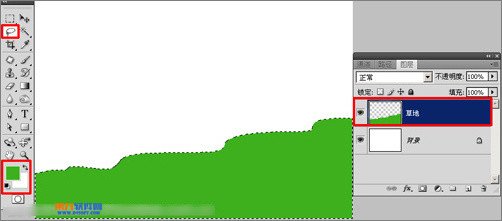
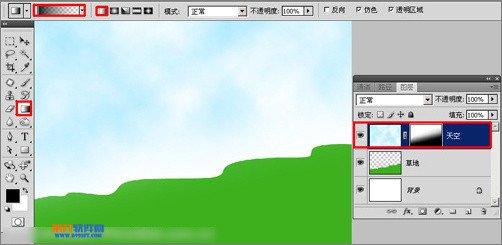
2、执行菜单:“图层”/“新建”/“新建图层”(快捷键Ctrl+Shift+N),新建图层并命名为“草地”,前景色设置为:#3db01d,选择套索工具,框出选区,按Alt+Delete键,填充颜色。
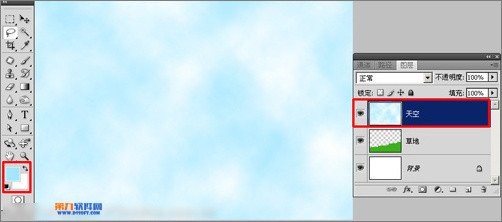
3、执行菜单:“图层”/“新建”/“新建图层”(快捷键Ctrl+Shift+N),新建图层并命名为“天空”,前景色设置为:#a3e6ff,执行菜单:“滤镜”/“渲染”/“云彩”。
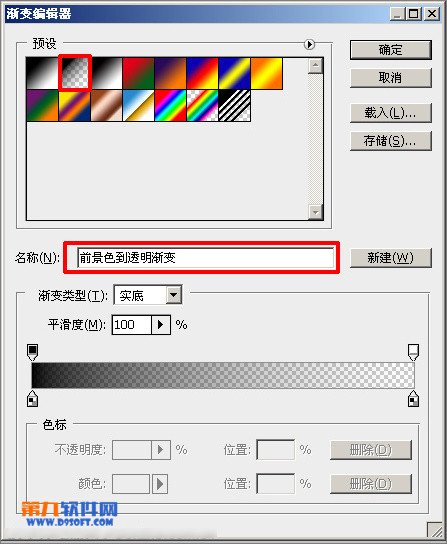
4、单击图层下方的添加图层蒙版按钮,给天空图层添加蒙版,选择渐变工具,单击工具选项栏上的渐变编辑器按钮,弹出“渐变编辑器”对话框,选择“前景色到透明渐变”样式,如图4所示;使用渐变工具,工具选项栏选择“线性”,从下到上拖曳出渐变。
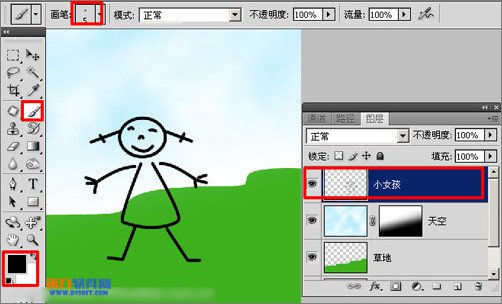
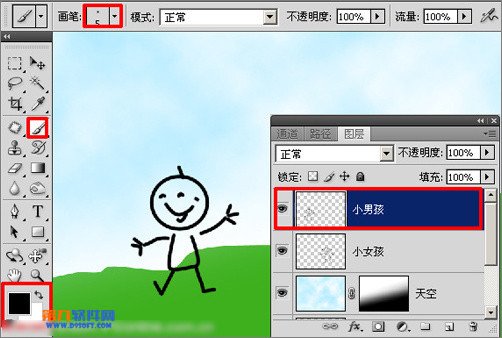
5、执行菜单:“图层”/“新建”/“新建图层”(快捷键Ctrl+Shift+N),新建图层并命名为“小女孩”,按D键恢复默认颜色,使用画笔工具,在工具选项栏上设置画笔大小为:尖角5像素,描绘出小女孩,如图6所示;新建图层命名为“小男孩”,一样方法,描绘出小男孩。
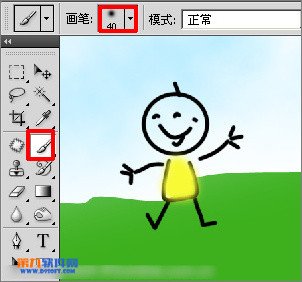
6、执行菜单:“图层”/“新建”/“新建图层”(快捷键Ctrl+Shift+N),新建图层并命名为“颜色”,前景色设置:#fa37cf,使用画笔工具,在工具选项上设置画笔大小为:柔角40像素,描绘出裙子的颜色,如图8所示;设置前景色为:#f8fa36,描绘出小男孩的衣服颜色。
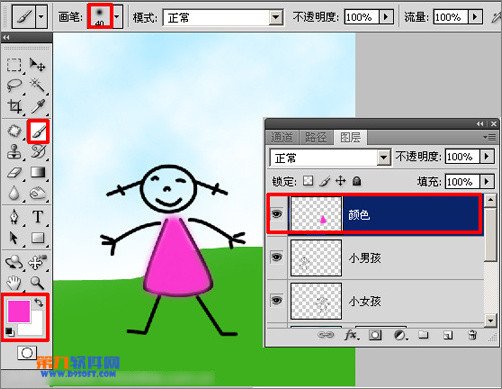
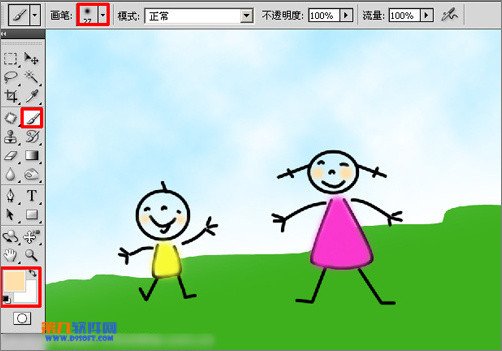
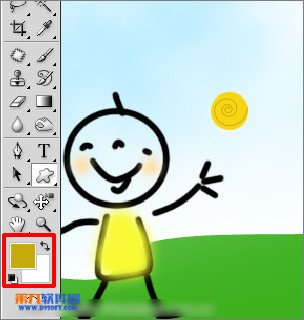
7、设置前景色为:#ffe0aa,使用画笔工具,在工具选项栏设置画笔大小为:柔角27像素,描绘出脸晕颜色。
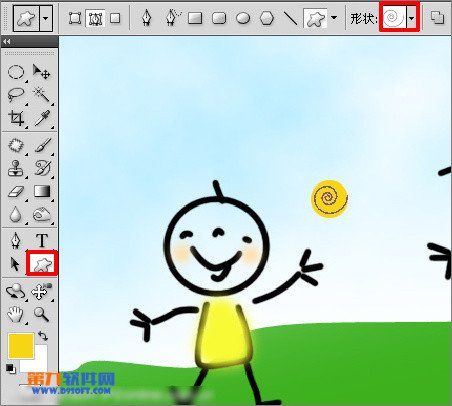
8、按Ctrl+Shift+N键,新建图层并命名为“糖”,前景色设置为:#f8d512,选择椭圆选框工具,框选出椭圆,按Alt+Delete键 填充颜色。
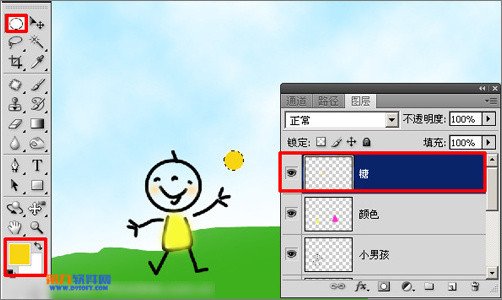
9、选择自定形状工具,在工具选项栏上的形状里选择:“螺线”,绘制出螺线,如图12所示;设置前景色为:#b99f0f,按Ctrl+Enter键得到选区,按Atl+Delete键填充颜色,按Ctrl+D键取消选区。
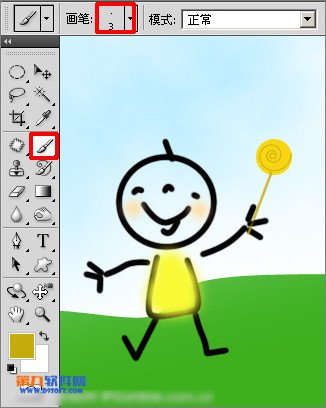
10、使用画笔工具,在工具选项栏设置画笔大小为:尖角3像素,按住Shift键,绘制出直线。
本文将继续为大家带来PS儿童节贺卡(二) Photoshop制作儿童节贺卡教程,想给你身边小宝贝惊喜的朋友们继续学习吧!
效果图:

本文来源:三联
如果您喜欢本文请分享给您的好友,谢谢!如想浏览更多更好的PhotoShop教程内容,请登录:http://www.tootnn.com/edu/image/1/index.html